





HyperPixel 4.0 – Hi-Res Touch Display
68,94€
In stock

 Do you have any further questions?
 HyperPixel 4.0: Hi-Res TOUCH Display for Raspberry Pi
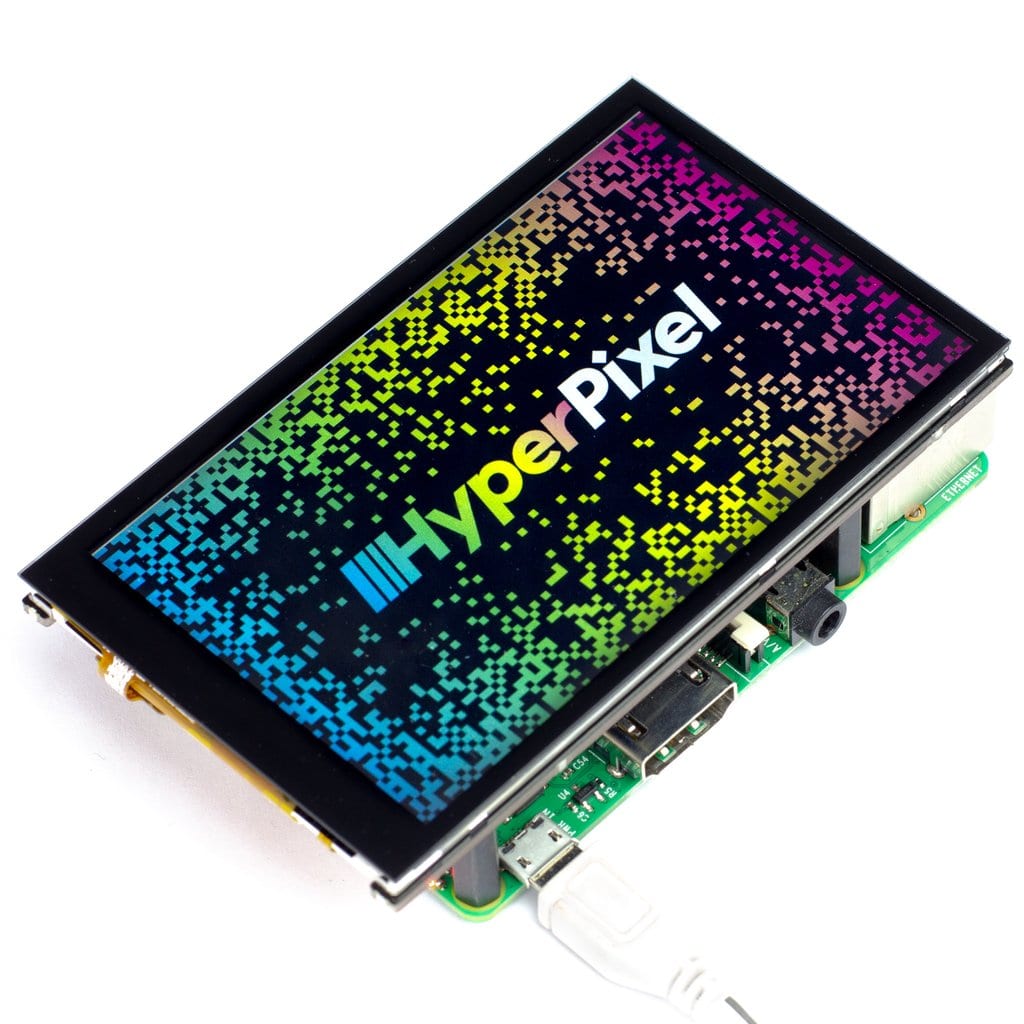
This Raspberry Pi display delivers a high-resolution, high-speed 4.0″ TFT screen with capacitive multi-touch support.
If you want to use your Raspberry Pi without a large number of cables or a bulky display, HyperPixel 4.0 is your best choice. By designing your own interface, you can control your project, display data, or even turn your Raspberry Pi into a tiny media centre.
Mattley built a vintage radio using this product!
HyperPixel features a fantastic IPS display, wide viewing angles, and a custom-made cover glass designed specifically for the touchscreen version. More experienced users will also appreciate the availability of an alternative I2C interface.
The display images shown on this page are NOT Photoshopped. The image shows the Raspbian desktop with a HyperPixel wallpaper.
HyperPixel 4.0 Touch Display features are:
- High-speed DPI interface
- 4.0″ IPS display (wide 160° viewing angle) (86.4 × 51.8 mm)
- 800 × 480 pixels (~235 PPI)
- 18-bit colour (262,144 colours)
- 60 FPS frame rate
- Contrast ratio: 500:1
- Capacitive touch (TOUCH version only)
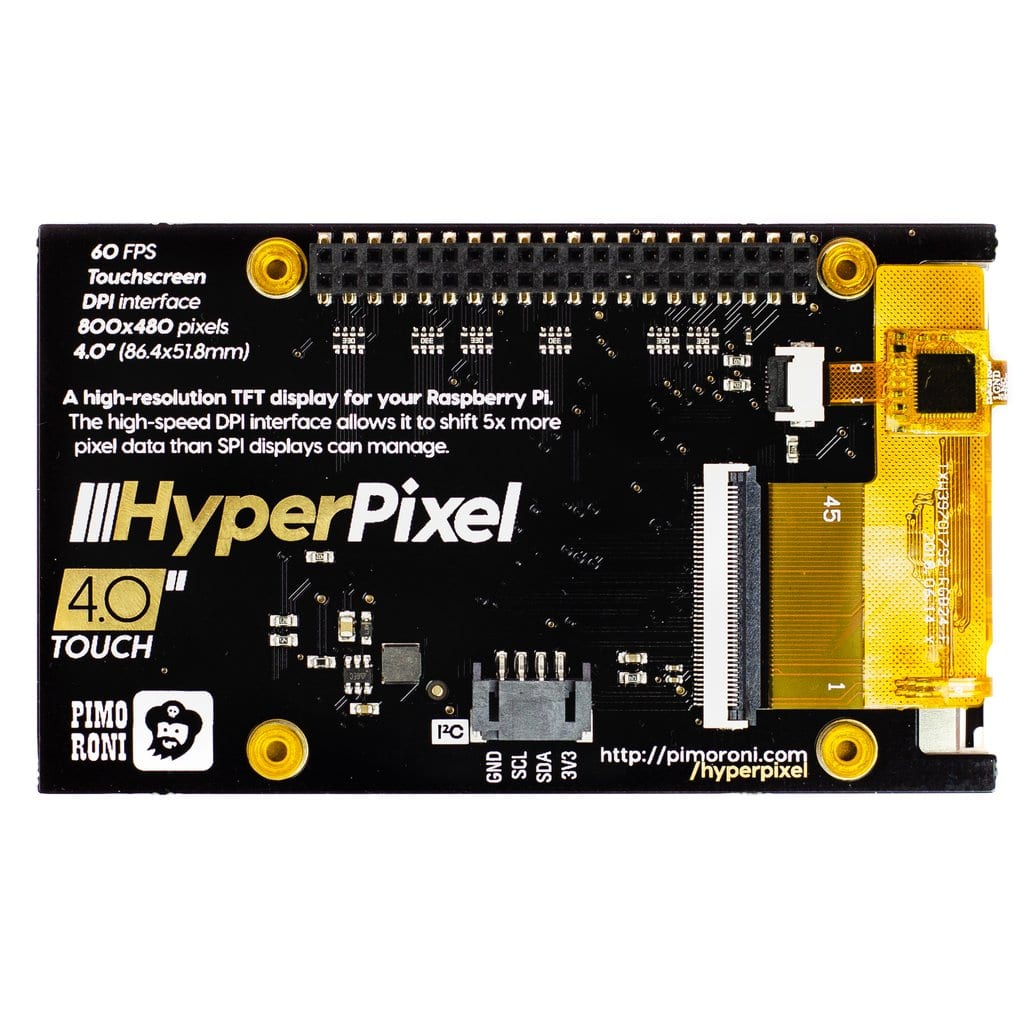
- Included 40-pin female header to increase height for Raspberry Pi B+, 2, 3, 3B+, 4B
- Standoffs included for secure mounting to your Raspberry Pi
- Compatible with Raspberry Pi 4B, 3B+, 3, 2, B+, A+, Zero, and Zero W
- One-line installer
Note: This version of HyperPixel is not yet compatible with Raspberry Pi OS Bullseye.
Thanks to the high-speed DPI interface used by HyperPixel, it can transfer pixel data up to 5 times faster than the standard SPI interface commonly used in small Raspberry Pi displays. It delivers a 60 FPS frame rate, and the resolution on its 4.0″ display is approximately 235 pixels per inch (800 × 480). HyperPixel supports 18-bit colour (262,144 colours).
The capacitive touchscreen on the touch version is highly responsive and supports multi-touch functionality.
No soldering is required as it comes fully assembled. The touch display is securely mounted to the HyperPixel 4.0 PCB and connected via a precise flush-mounted FPC cable. To start, simply plug the HyperPixel 4.0 into your Raspberry Pi and run the installer.
Attention: Do NOT press on the screen surface when installing HyperPixel 4.0 on your Raspberry Pi. Hold the board by its edges and gently align it with the extended header or GPIO header.
It works with all 40-pin Raspberry Pi boards, including Raspberry Pi Zero and Raspberry Pi Zero W. If you are using a larger board such as B+, 2, 3, 3B+, or 4B, use the included 40-pin header to raise it to the correct height. If you are using a Raspberry Pi Zero or Zero W, plug it directly into the GPIO.
You can securely mount HyperPixel 4.0 to your Raspberry Pi using the included standoff kit. Simply screw the standoffs into the mounting points on the underside of the HyperPixel 4.0 PCB, then secure it to your Raspberry Pi using screws through the mounting holes.
HyperPixel 4.0″ Software
A one-line installer helps you configure your Raspberry Pi for HyperPixel 4.0. In the touchscreen version, it also enables touch support. To install the software, you will need another display, keyboard, and mouse. You can also install it remotely via SSH by following the guide. It will show you how to install it on your Raspberry Pi without any issues.
To run the installer, open a terminal and type: curl https://get.pimoroni.com/hyperpixel4 | bash
GitHub library: https://github.com/pimoroni/hyperpixel4
Raspbian Wheezy is not supported by the Python library.
Pimoroni name: HyperPixel 4.0 – Hi-Res Display for Raspberry Pi – Touch [PIM369]
2 reviews for HyperPixel 4.0 – Hi-Res Touch Display
Show only reviews in English (0)
You must be logged in to post a review.
-
25,76€
Display HAT Mini
-
31,38€
Round Display for XIAO
-
79,65€
Raspberry Pi Touch Display 7″
-
44,65€
HyperPixel 4.0 – Display Hi-Res Non-Touch
-
76,79€
HyperPixel 4.0″ Square Touch
-
69,44€
HyperPixel 4.0″ Square Non-Touch
-
Price range: 0,39€ through 2,96€
Silicone USB C Dust Cover Insert
-
4,98€
Liquid Crystal Light Valve / LCD Shutter


-
19,10€
Audio DAC SHIM: Line-Out
-
49,62€
Raspberry Pi 3 B+
-
105,44€
Raspberry Pi 4 modello B di 4 GB
-
Price range: 0,39€ through 2,96€
Silicone USB C Dust Cover Insert
-
25,76€
Display HAT Mini
-
4,98€
Liquid Crystal Light Valve / LCD Shutter
-
57,05€
HyperPixel 2.1″ Round Touch
-
16,19€
Black Cover for 7″ Touch Display




 5% discount on every order reviewed!
 Raspberry Pi IN STOCK!

Davide F… (verified owner) –
Display fantastico, appena l’ho installato (no problem con la libreria), si è connesso e ha iniziato a funzionare
Antonio d… (verified owner) –
Display eccellente. Ottima definizione e impeccabile libreria software!