




&media=https://www.pilover.com/wp-content/uploads/2019/08/Breakout-Garden-HAT.jpg)
Breakout Garden HAT (I2C)
16,32€
In stock

 Do you have any further questions?
 Breakout Garden HAT (I2C)
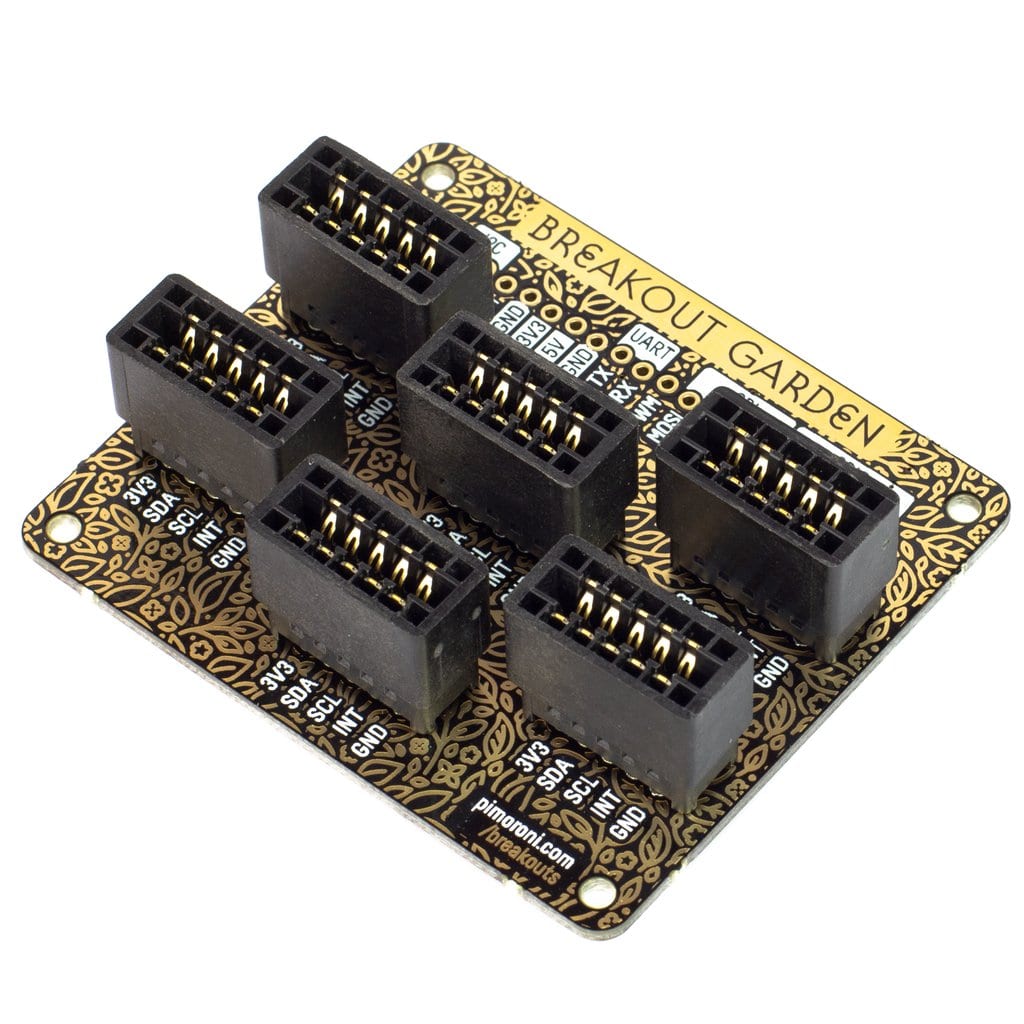
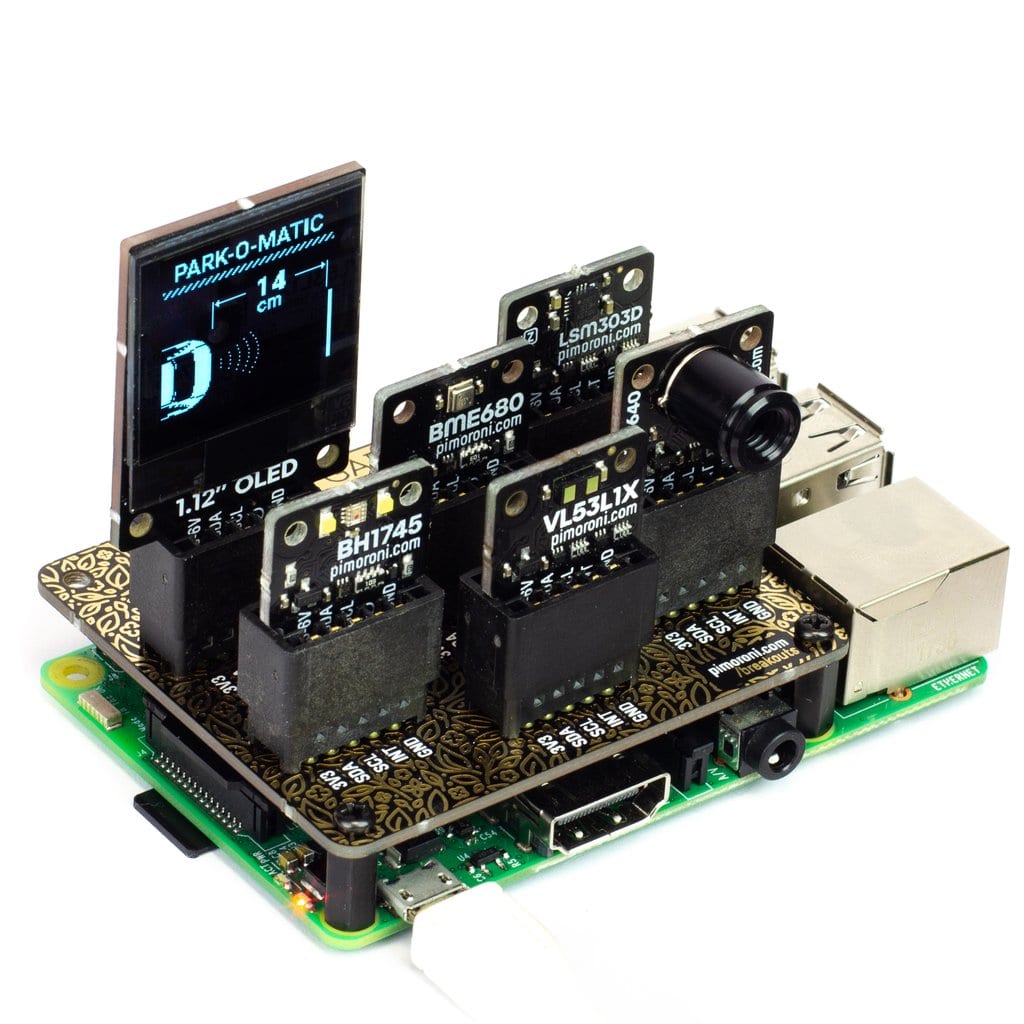
With Breakout Garden, you can grow your projects! You’ll find that this product is the easiest way to use breakouts with all Raspberry Pi models, since no soldering is required. You can start coding and creating simply by plugging up to 6 Pimoroni breakouts (I2C only) into the slots on the Breakout Garden.
Attention: This version of Breakout Garden does not support SPI breakouts. The version that supports SPI breakouts is the Breakout Garden HAT (I2C + SPI), which features 2 slots with 7 pins for SPI and 4 slots with 5 pins for I2C.
You can prototype projects without complex circuits, soldering, or breadboards and, thanks to the way Breakout Garden works, you can always change your setup.
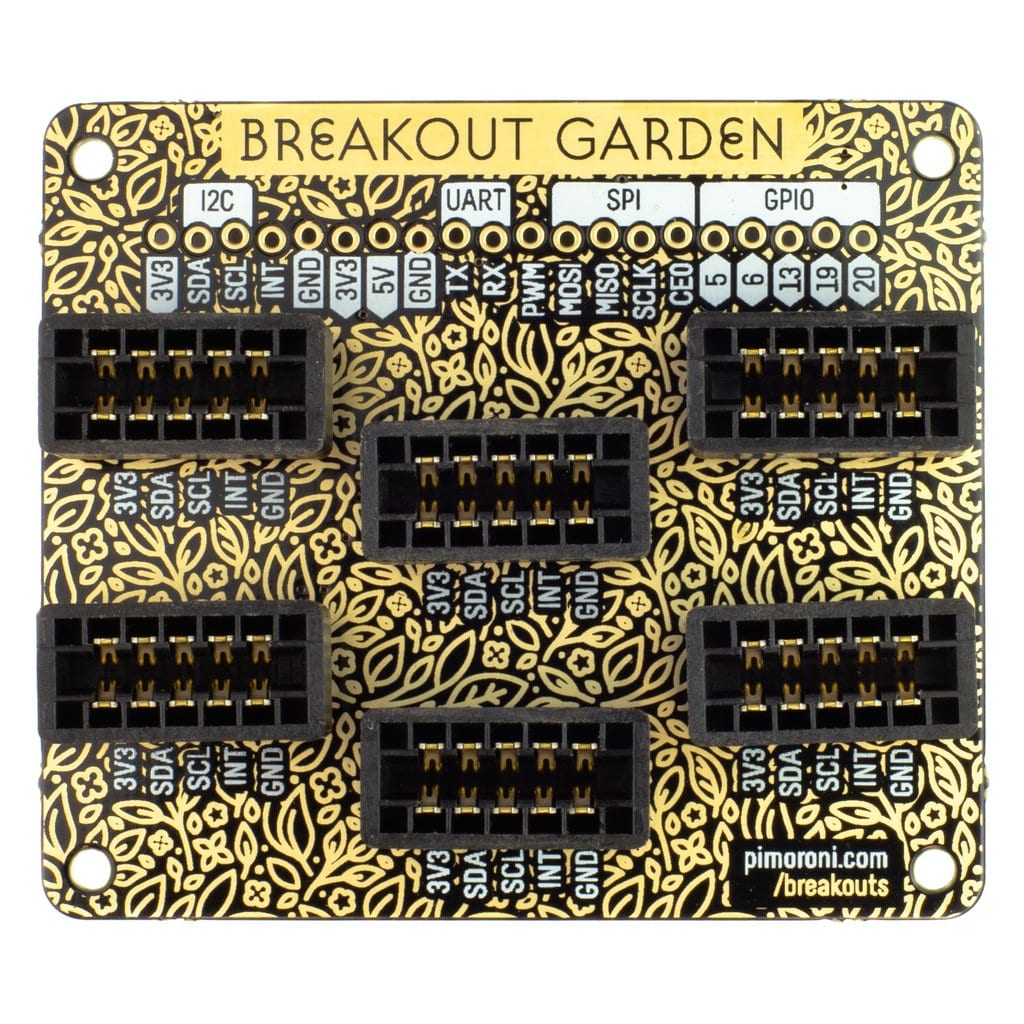
Breakout Garden features six sturdy edge-connector slots. These connect the five pins found on each Pimoroni breakout to power and the I2C pins (for data) on your Raspberry Pi board. Since I2C is a bus, it is possible to use multiple I2C devices at the same time, as long as they do not share the same addresses. Note that all Pimoroni breakouts have different addresses.
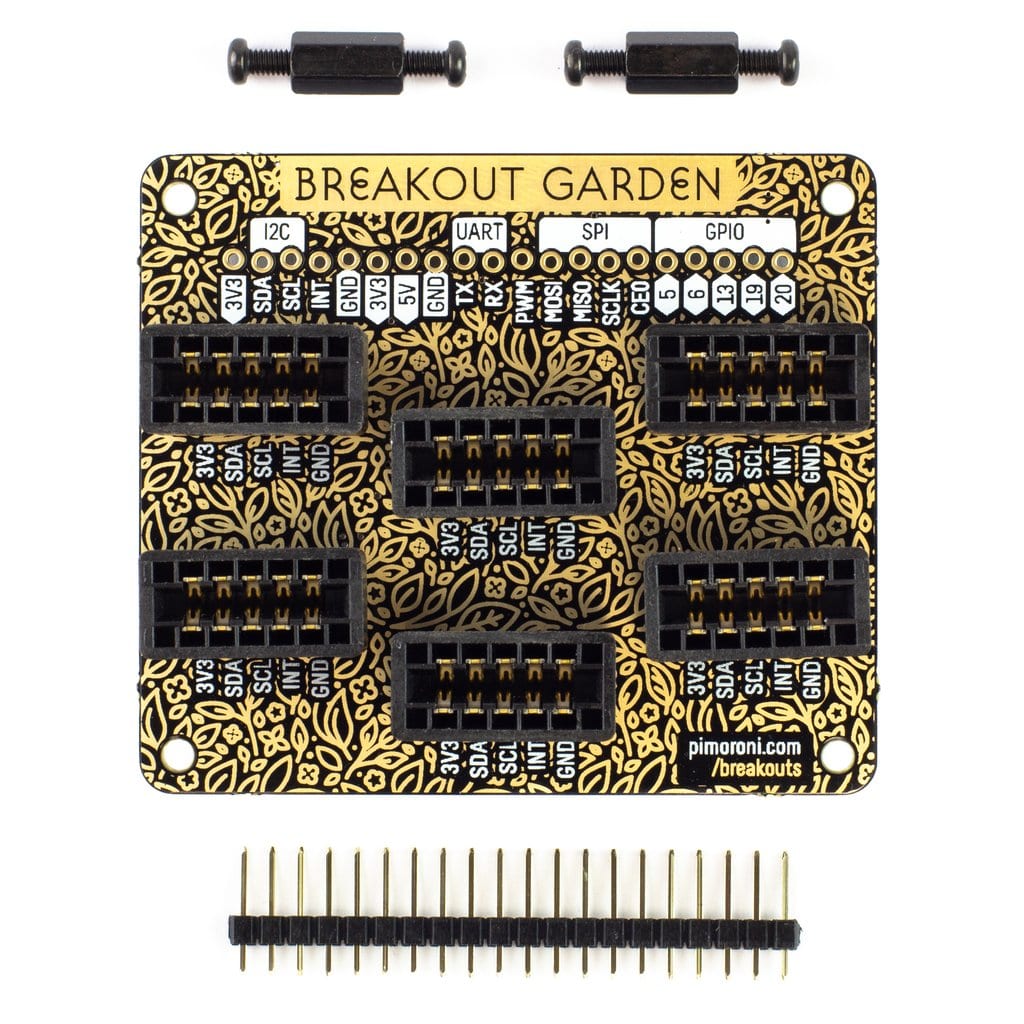
At the top of the Breakout Garden HAT there is a row of usable pins, so you can connect and integrate additional devices into your projects if needed. If you have Pimoroni breakouts with pre-soldered headers, this top row of pins can be used together with other breakouts on the Breakout Garden HAT.
Breakout Garden HAT Features
- Six sturdy edge-connector slots for Pimoroni breakouts
- 0.1” pitch, 5-pin connectors
- Broken-out pins – male header strip (1×10) included
- Standoffs (M2.5, 10 mm height) included to keep your Breakout Garden stable
- Reverse polarity protection (built into the breakouts)
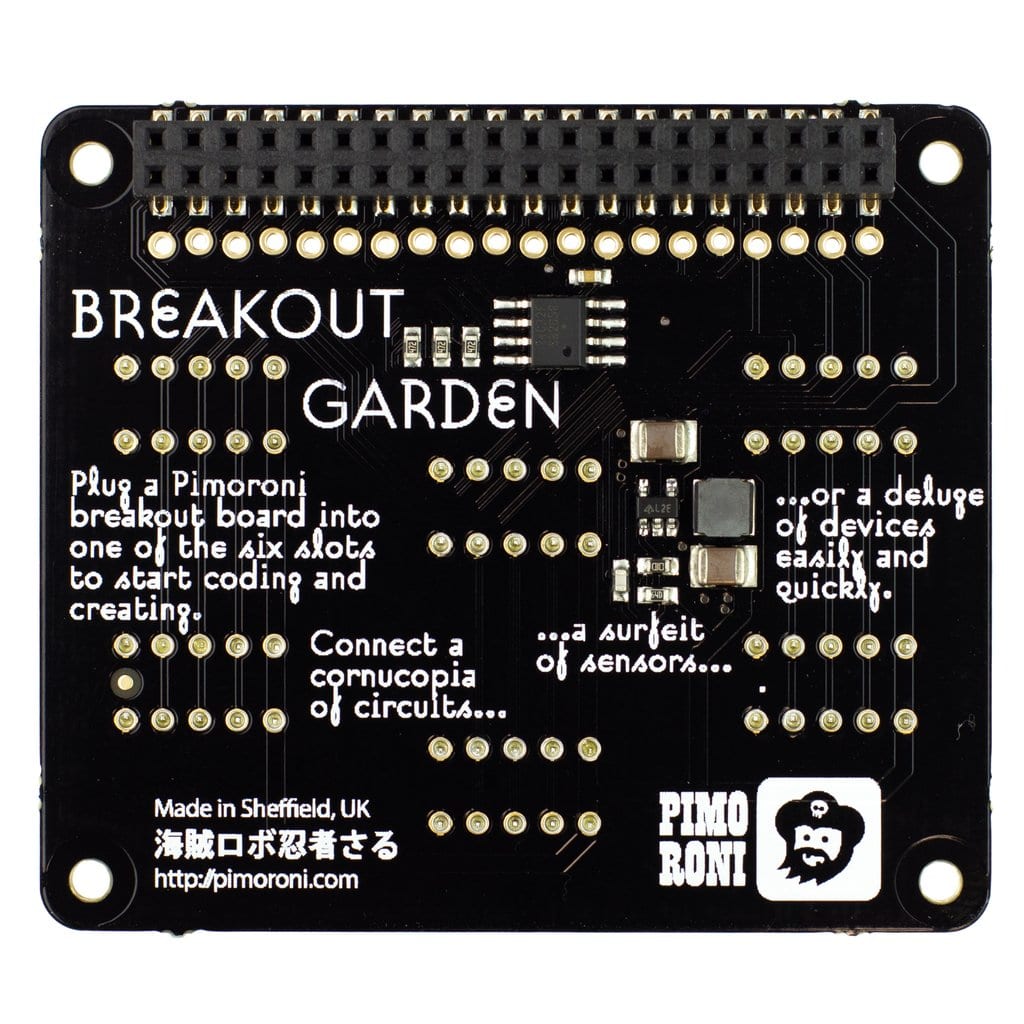
- HAT-format board
- Compatible with Raspberry Pi 4B, 3 B+, 3, 2, B+, A+, Zero, and Zero W
How to Use the Breakout Garden HAT
It is a good idea to use the included standoffs to securely mount the Breakout Garden HAT to your Raspberry Pi board. Insert the screws from the underside of your Raspberry Pi through the mounting holes, then screw the standoffs onto them. To keep everything stable and secure, press the Breakout Garden HAT onto the GPIO pins of your Raspberry Pi, then fasten the standoffs through the mounting holes.
I2C (the protocol used by Breakout Garden) works in such a way that it does not matter which slot you use for your Pimoroni breakout. Each I2C device has an address printed on the back of the breakout, which it uses to identify itself to other I2C devices and to your Raspberry Pi.
Pimoroni breakouts are built with reverse polarity protection, so if you accidentally plug one in the wrong way, it won’t overheat. However, since you’ll want to install it correctly, make sure to match the labels on the pins of your breakout with the labels on each slot of the Breakout Garden HAT.
Breakout Garden HAT Software
Go to the Breakout Garden GitHub repository and run the automatic installer. It’s very easy. Plug some breakouts into the Breakout Garden HAT and start the installation. The correct software for the connected breakouts will be installed automatically. On GitHub you’ll also find examples showing what you can do.
Here are some interesting project ideas you can build with this product:
- A laser tape measure using the VL53L1X Time-of-Flight Breakout and a 1.12″ OLED
- An environmental display using the BME680 Breakout, BH1745 color and light sensor breakout, and a 1.12″ OLED
- A highly sophisticated presence detector using the MLX90640 thermal camera breakout, the 6DoF LSM303D breakout, and the BH1745 color and light sensor breakout
Attention: The marking on the HAT for GPIO pin 20 is incorrect and should read 26.
Pimoroni name: Breakout Garden for Raspberry Pi (I2C) [PIM377]
Show only reviews in English (0)
You must be logged in to post a review.
-
19,26€
Breakout Garden HAT (I2C, SPI)
-
11,73€
Breakout Garden pHAT (I2C)
-
11,73€
Breakout Garden Extender kit (3 pairs)
-
17,08€
pHAT Stack completamente assemblato
-
30,20€
2.23″ Monochrome OLED Bonnet
-
22,12€
RoboHAT: Controller Robotico completo
-
12,93€
Servo Bonnet per RPI con 16 Canali PWM
-
22,39€
Servo HAT per RPI con 16 Canali PWM – Mini Kit




 5% discount on every order reviewed!
 Raspberry Pi IN STOCK!

Reviews
There are no reviews yet.